


Well, that was a nice little session of blogging and remarkably I am all caught up! Guess I need to go do some crafting so I can post more :)


 I have big plans for painting some large furniture in my house because 1) they were free items that have seen better days (where the stain/finish is ruined (hence people got rid of them in the first place), 2) and the woodwork underneath needs patching (which doesn't work with staining, staining wood putty never looks good) so they are getting paint. I had two pieces in my front room that were going to undergo the treatment. The first was a glass front cabinet on which I kept my stereo. This piece had to be fixed first because it had a safety hazard- plate glass panels. This, of course meant my 1 year old thought this was the perfect thing to hit (and because I am a mom, who is sworn to protect her, my first reaction to the hitting was a look of terror, which must have been hilarious to my daughter...so the doors had to go get replaced with tempered glass (this is the stuff used in car windows that brakes into tiny squares instead of razor sharp shards). With the doors off it was time to finally refinish this lovely. (see it above on the left in all it's displaying glory, and on the right with the doors gone and all the goodies removed).


 After discussing my need for "new" with my husband (and assuring him I intended to only upgrade the house and not the husband) I set about removing the popcorn ceiling from my kitchen/dining room and hallway. This was one of the projects that you just know is going to be messy, so you avoid it. (Here are the before pictures), but I finagled an ingenious (if I do say so myself) tool to assist me. It required a wide putty knife (to do the scraping), a wire coat hanger (bend it out so it looks like a ball on a stick), and then a plastic grocery bag (fashion the bag and the hanger into what looks like a butterfly net). As you spray the ceiling with a lite mist of water (to keep the dust down) you run the putty knife along and catch all the bits in the bag hanging underneath. Remarkably, after I had completed the entire scraping project I only had one dustpan of bits to collect off the floor! Then, on to the refinishing of the ceiling. Luckily, ceilings look good with slight texture so this only required priming to seal the ceiling and then painting with ceiling white.

 So here, I got my husband involved in the process (as he is significantly taller than I am, so I edged and he painted. Once that was all done, my kitchen looked significantly better, but not as great as I wanted it to. First, I thought the door looked out of place, so it gained a coat of (primmer and three actually) paint too. Better, but still not awesome. So here, I got my husband involved in the process (as he is significantly taller than I am, so I edged and he painted. Once that was all done, my kitchen was bright white and black checks and looks better, but now it needed some color. Enter, repainting the walls.


 First, we got some some sandstone pavers and I layed out this path (wide enough for the mower) and we put in brick pavers on the front half of the fence. This path as a weedguard underneath and pea gravel in the cracks to prevent having to pull stray plants out of it. (that black thing is the composter).
 I tried my hand at making fresh baked whole wheat bread. It ended up delicious, but for whatever reason when I tried to eat more than one slice I would end up with hearburn (no idea why), so it really didn't work as the sandwich bread replacement for us. The major problem with it though was there is no way to turn down fresh baked bread...so that first loaf, lasted one meal (and these were sandwich bread sized...so it will be a while before we try that again).
 Next up, I repaired for a friend a poor bear who had a run-in with their dog. This was a childhood toy that had unfortunately been left on a bed with a dog that thought all stuffed animals where theirs to play with, so after a lot of effort (and some new material to give the bear a second chance, the little guy was brought back to life. I think he feels much happier too.
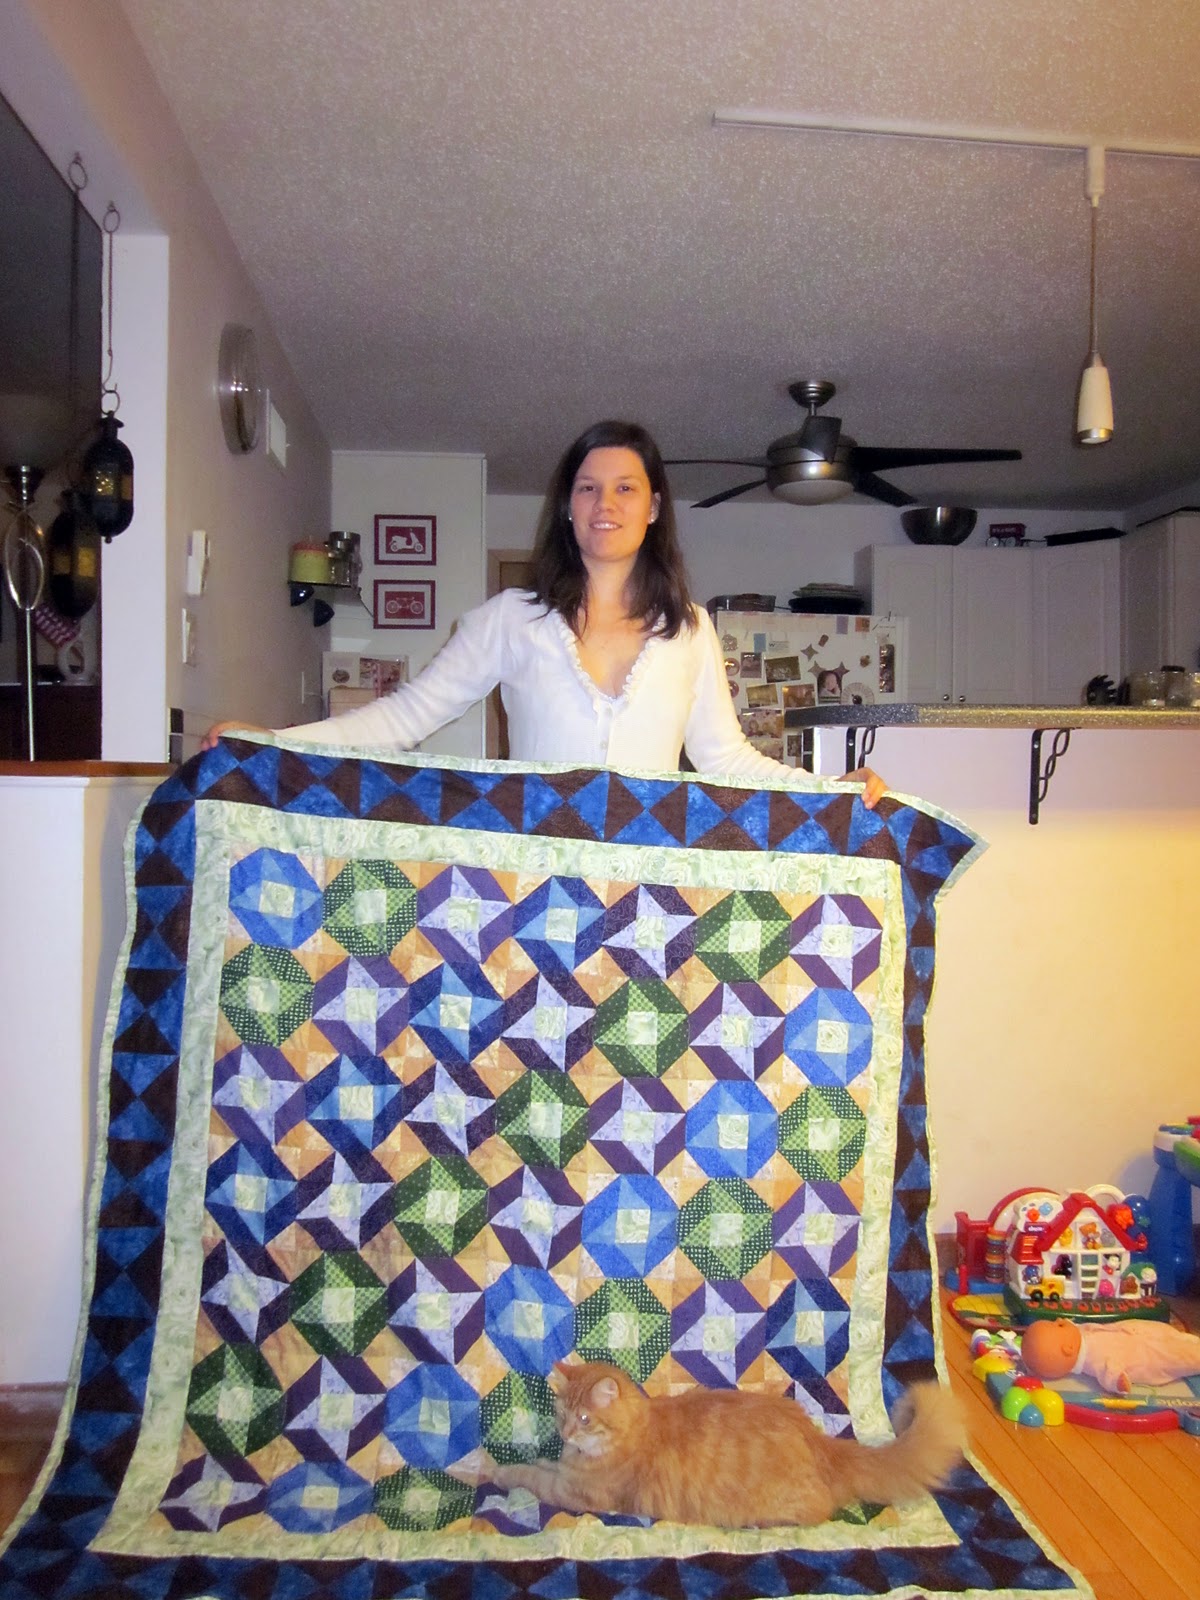 Also for the wedding, I had to make some wedding gifts. (The first quilt was finally finishing up one started for a friend's wedding present back in December (they live in Boston as well so personally delivering it made me feel better for not having it done for the actual wedding and being over 6 months late (sigh...). The second was made for the newly weds and I am proud to say that I didn't repeat a colored fabric even once! that's right, there were 55 different fabrics in this quilt (counting the white one). I really like how they turned out (though they originally were a bit smaller, but I didn't want anyone to think I was giving a baby blanket as a wedding gift!
 Prior to heading out on my daughter's first plane ride though, we had the first of my daughter's first birthday parties (yes she got two). I made delicious chocolate zucchini whole wheat cupcakes (they also had a hint of mint because I used mint chocolate chips- they were really fantastic). The first party took place at a city music festival where my daughter's favorite band was playing. Pokey LaFarge and the South City Three were the act (my little girl adores the beat of their song La La Blues and she dances up a storm) so we invited all our best buds and family to join us at the show for cupcakes. We had a blast.
 The next day we flew off to bean town and spent my little one's b-day exploring the city (it really is a great city to visit if you get the chance). And we have a lovely stroll on her actual birthday down by the water.


 In addition, I also had made some ball jar lanterns to hang from the tree out front with some streamers to welcome guests.