I’m playing catch-up a little bit today. I’ve been a crazy crafter as of late and wanted to be sure I covered everything that I have been doing.
First off, I’ve been in a bit of a funk the last few days- just a bit cranky and overwhelmed, but like most individuals with that sort of mood thing going I tend to take it out on those closest to me (so my husband) which is unfortunately not much fun for anyone involved. (I’m actually surprised he hasn’t started calling ahead before determining if he wants to come home or not. Anyway, not the most productive way to deal with crankiness.
You know what is productive? Crafting to take care of moods! I really do enjoy working on something that I can focus on and that I can look at later and say, “I made that” as it is a pretty rewarding feeling and gets those good endorphins flowing. I also love solving a problem when I craft, since it’s then an extra rewarding experience…hence the toy drawer.
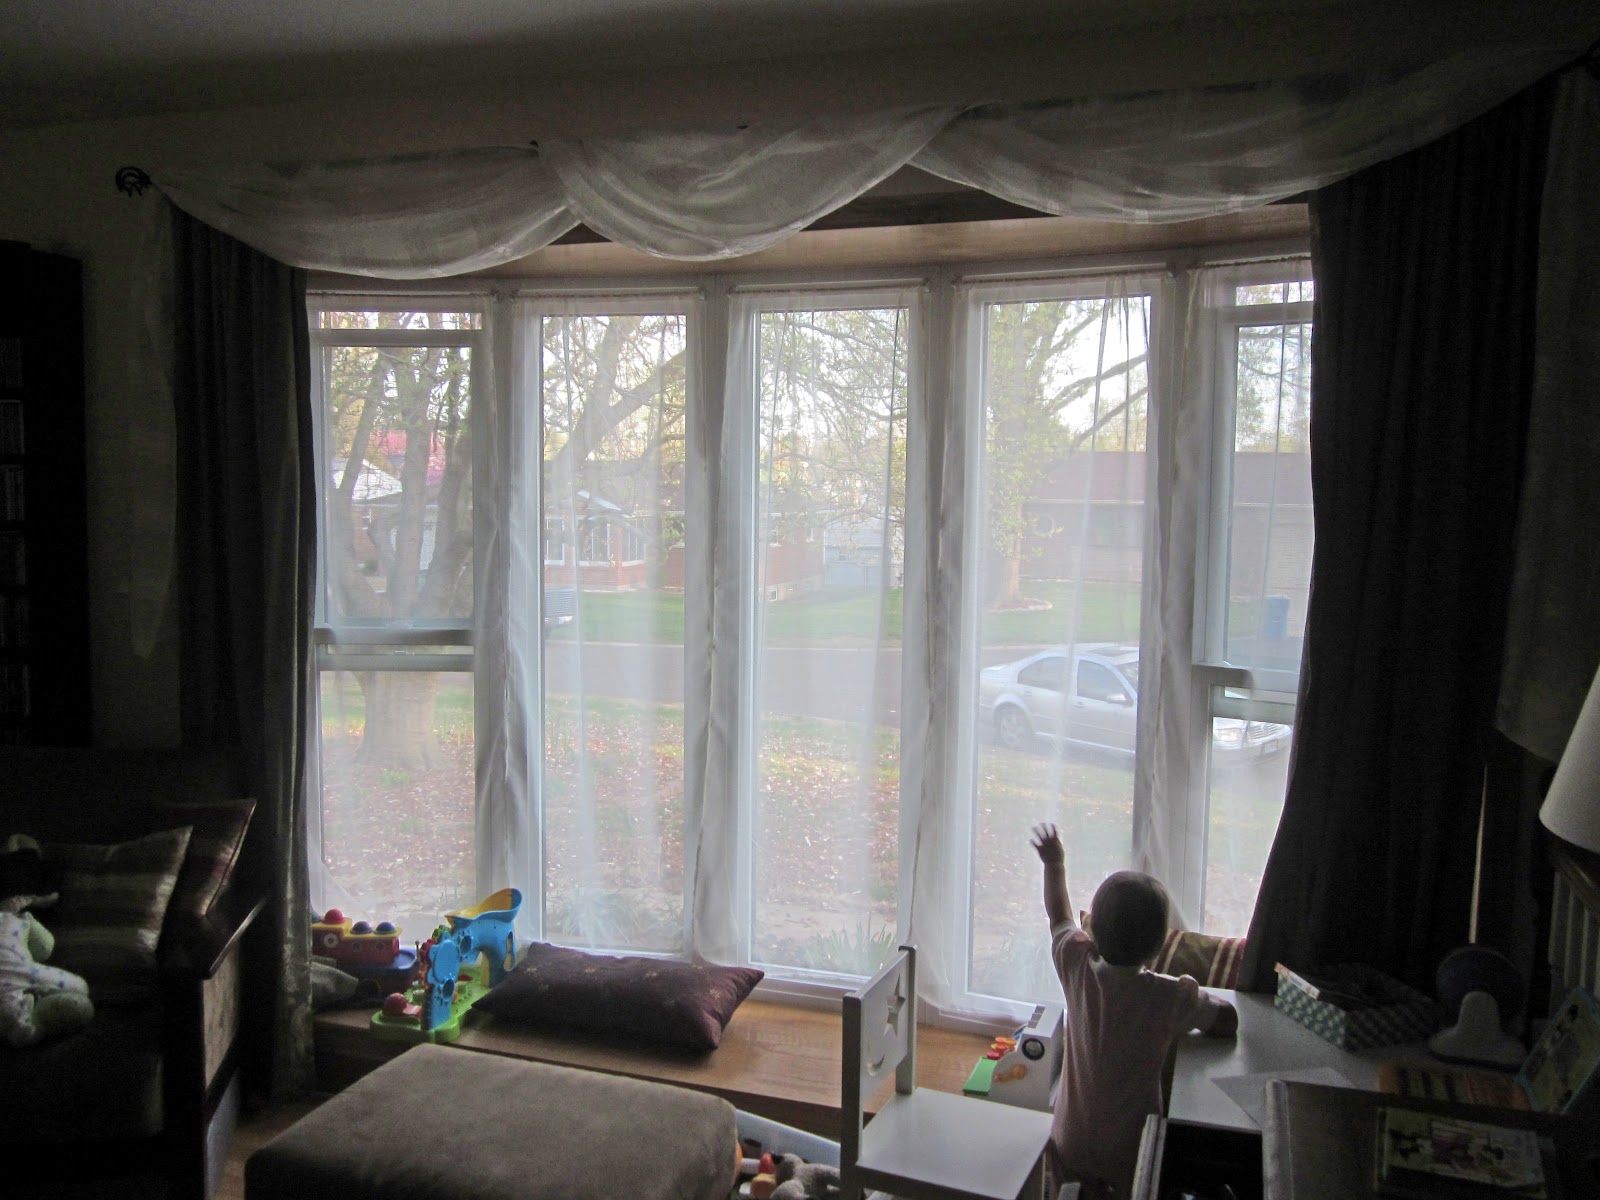
 |
see all the toys that were
under the loveseat! |
We have a fairly compact house and since I work from home and watch my daughter full time, I wanted to be sure I have a lot of fun activities for her while I work. So, in the family room upstairs we have a lot of toys that have been hanging out under the loveseat in a makeshift drawer. Here’s the issue- we have way too much furniture in the family room (a china cabinet, an extra dining room chair (for company), two comfy chairs, a CD tower, an ottoman a kid’s table and chairs set, my desk and chair for work, an end table a floor lamp and a loveseat). This wouldn’t be a huge problem, except we also have an open staircase in the room which my daughter is fascinated with and a large bow window with a window seat. I don’t want to put large furniture in front of the window seat (as that would defeat the purpose of the window seat) and I don't want chairs that my daughter can climb in front of the stairs (as she likes to look over and isn't as scared of falling as I am). So that removes two whole walls of space and the room isn't large enough to have anything bumped off a wall...so the loveseat (which was in the least pristine shape of all the furniture) got donated to a charity - leaving a large mass of toys with no home.


I originally thought I would use the large plastic storage container that is in that picture to put the toys under the chairs- but that resulted in a lot of unused space, so I thought I would try my hand at making a custom toy drawer. I don't have a table saw, and no wood to do it anyway (and since I am on a huge budget saving kick at the moment (we're doing pretty good on that score- but that may be contributing to my mood...ah well, back to the box) I decided to make a cardboard box into a fabric covered drawer. Here is the spot that it needs to fit...here is the largest (flattest) box I had. Here is the tricky part. These chairs are not square.
The drawer had to be a quadrilateral measuring 25 inches in front, 23 in back and 22 inches long. It then could be up to 7 inches tall (if I wanted to make a handle on it) or 6 inches to allow for pulling out without the handle (I opted for no handle). Other issue- I have a cat...a long-haired cat. That meant I had to use a fabric that wouldn't automatically attract hair and was thick enough to be pulled across the floor without showing instant wear. So I seached through my bins and found a large piece of duckcloth that was in a mostly unoffensive pattern.

I started by cutting apart the box into flat portions so I could measure out the perspective items. first I found a piece that was both 25 inches long and 22 inches wide. I then measured one inch off each side to determine the 23 inch side and trimmed accordingly. I then went about cutting twelve inch walls by the length of each side (and created a score line to fold the box sides and attach them to the bottom (while giving a little support). Once I had all the sides attached I temporarily taped it to make sure it fit (see), then laid it flat with the sides laying down on top of the fabric so I could cut the appropriately sized amount. After that I used Mod Podge to attach the fabric to the box, and some industrial duct tape (in a funky pattern) on the inside to prevent the box from being ripped apart when pulled by one side multiple times).

Tada! Finished box in a black and white check pattern. that fits over half the toys (since I could only make one from the fabric/box I had available- I only made one (so the plastic bin will sit under the other chair until I have another large box come in) and can get some more fabric.
Look for other project tomorrow!


 After I figured out how to attach curtains- I had to make curtains to fit these small rods. I decided on sheers since they give some basic privacy while still letting in lots of light and prevent the necessity to move the curtains to see outside in addition to being relatively light in weight so they shouldn't pull down my rods. I waited until decorators fabric went on sale at the fabric store and scored 6 yards of a sheer fabric perfect for my windows for less than $4/yard.


 So the first thing I did was remove the cushion to determine if it was possible to remove the covering in one piece. It had the protective black fabric found under most chairs, so I had to carefully remove the staples to that so I could see that the cover was also stapled, but otherwise it came off very easily. Once I had removed it I was able to add to the batting under it (which mostly was in really good shape) and cut out new fabric (from a scrap of fabric I had left over from a pillow I made a few years ago) that was big enough to cover the area from the former cover.


